
Table of Contents
Going live on YouTube lets creators interact with viewers in real time through live chat, Q&As, tutorials, gaming sessions, interviews, and other interactive content. The good news is that you don’t need an expensive studio or complicated equipment to get started.
A reliable internet connection, a suitable camera or phone, and clear audio are often enough for your first stream.
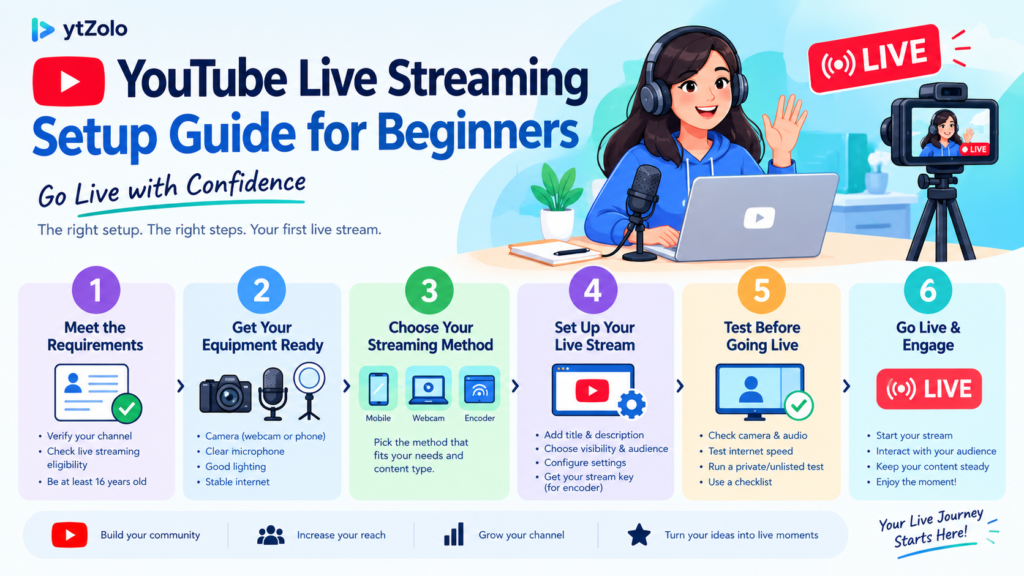
This youtube live streaming setup guide for beginners covers the basic steps you need to start streaming confidently. YouTube presents three ways to do live: via mobile, via a webcam on a computer, and finally, with the help of encoder or streaming software to control and manage the process more precisely.
The guide covers the general equipment, YouTube setup, configurations, account settings, and preparations, testing, and even the actual live-streaming process.
It also includes guidelines on how to live-stream on YouTube, promote the stream, and solve frequent issues like quality, sound, or connection problems. By the end, you’ll have a practical setup you can use for your first YouTube Live.
YouTube Live Streaming Requirements for Beginners
Before you buy anything or download streaming software, make sure your channel actually qualifies to go live. YouTube’s official rules are simple, but they can be a problem for first-time streamers who jump right into buying gear.
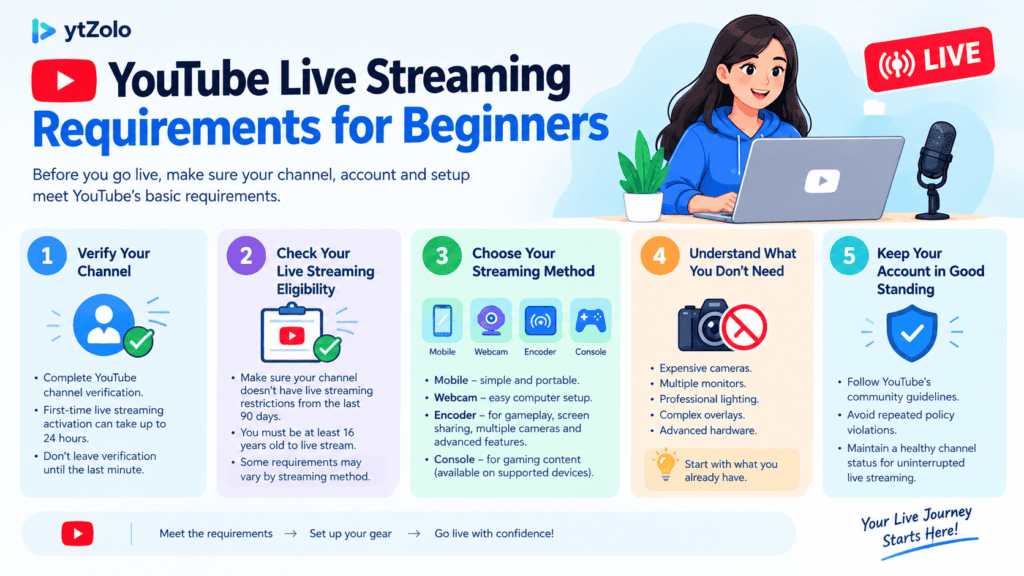
To live stream on YouTube, your channel needs to have no live streaming restrictions in the past 90 days and it needs to be verified. In addition, YouTube requires that streamers are at least 16 years of age.
Get these two boxes checked first, and everything else in your streaming setup becomes much easier to plan.
Verify your YouTube channel before going live
Channel verification is a one-time step where YouTube confirms you are a real person, not a bot, usually by sending you a code to your phone number.
It’s the same verification that unlocks other “intermediate” features like uploading videos longer than 15 minutes or adding custom thumbnails, so if you’ve already done either of those, you may already be verified.
For beginners, this step deserves attention early rather than last-minute. Starting your first live stream requires at least 24 hours to enable live streaming access after verification. That means if you’re planning your first stream for Saturday night, verifying your channel on Saturday afternoon won’t work.
Once that initial 24 hour activation period passes, though, you can live stream instantly going forward. The smart move is to verify your channel as soon as you know you want to stream — even weeks in advance — so activation is done and forgotten by the time you’re ready to broadcast.
Check your YouTube live streaming eligibility
Verification alone isn’t the full picture. YouTube also checks your channel’s standing: any live-streaming restriction issued in the last 90 days will block you from going live, even on a fully verified channel.
These restrictions are usually related to community guideline strikes or previous streaming violations, so it’s a good idea to check your channel status in YouTube Studio before planning a stream date.
In addition, it’s important to understand that general eligibility (verification + clean 90-day history) is just the baseline — some streaming methods have additional requirements beyond the baseline, so it’s a good idea to plan your preferred streaming method in advance, rather than assuming there is a one-size-fits-all approach
Choose between mobile, webcam, and encoder streaming
YouTube officially supports live streaming from mobile, webcam, encoder, and console setups, but beginners useually start with one of three:
- Mobile streaming — the simplest option, straight from your phone or tablet. Good for portable, on-the-go broadcasts, though mobile streaming carries its own subscriber requirement on top of the general eligibility rules.
- Webcam streaming — a straightforward option for anyone streaming from a computer with no extra hardware beyond a webcam and mic.
- Encoder streaming — built for more advanced production: gameplay capture, screen sharing, multiple cameras, external microphones, and overlays.
Pick the method that matches what you’re actually filming, not the one with the most features.
What beginners don’t need
It’s easy to assume live streaming demands a studio-grade setup. It doesn’t. New streamers typically don’t need:
- Expensive cameras
- Multiple monitors
- Professional studio lighting
- Complex overlays
- Advanced production hardware
Begin with the phone, webcam, or laptop you have. You can always upgrade your tools once you realize that streaming is a long-term activity and that your channel is verified and eligible.
YouTube Live Streaming Equipment: What You Actually Need
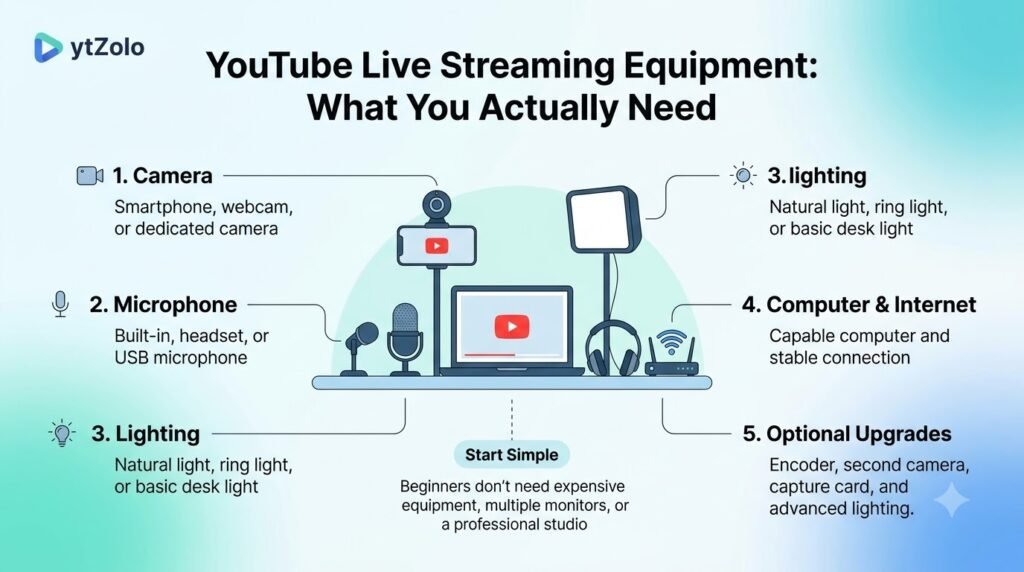
Camera: Start with the equipment you already have
When starting your live streaming journey, you do not need to invest heavily in a studio-grade cinema rig. You can work with what is already available:
- Smartphone camera: Modern phones feature high-resolution lenses that rival entry-level cameras.
- Built-in laptop webcam: Perfect for the occasional stream, as most have terrible low-light performance anyway.
- External webcam: A plug-and-play USB webcam offers a reliable step up in sharpness and color accuracy.
- Dedicated camera: DSLR or mirrorless options provide professional depth-of-field and clarity.
Upgrade when you need it for a specific reason. If you do a different type of content that requires more shots, uses lower lighting, has a professional appearance, or you need to output over HDMI for longer periods without the laptop heating up.
Microphone: Prioritize clear audio
Online audiences are remarkably forgiving of soft video quality, but they will leave instantly if your sound is muddy, Faraway, or distorted. Investing attention here matters most.
- Built-in microphone: Prone to picking up room echo and computer fan noise; use only as an absolute last resort.
- USB microphone: Ideal for beginners due to its easy connection to a computer and high-quality recording of computer voices.
- Headset microphone: Mostly used for playing computer games and has a convenient design, but the quality of microphone depends on the device.
- External microphone: Shotgun or lavalier microphones are good options as they help record voices clearly while canceling all unwanted sounds.
Lighting for a better YouTube live stream
Good lighting transforms ordinary video into a polished broadcast. Rather than chasing expensive panels, focus on intelligent positioning:
- Window/natural lighting: Position yourself facing a window for soft, free illumination.
- Basic desk lighting: Tilt small lamps toward your face, rather than behind you.
- Ring light: Evenly lit, shadowless illumination on the front face (used on talk shows, etc.)
- Key light: Place your primary light roughly 45 degrees to the side and slightly above eye level for natural depth.
Internet connection and computer requirements
Technical stability keeps your live stream from pausing or dropping completely.
- Stable upload connection: Check if your upload speed comfortably exceeds your target bitrate.
- Wired vs. wireless connection: It’s always better to use an Ethernet connection rather than Wi-Fi to avoid possible packet loss.
- Computer performance: Make sure you CPU and RAM can handle the encoding process.
- Best practices: Close all memory-intensive applications and perform a private test broadcast to make sure that your audio and video are in sync.
Basic beginner setup vs. advanced setup
Beginners can—and should—start small before scaling up:
- Basic setup: Laptop + built-in or plug-and-play webcam + USB microphone + stable internet connection.
- Advanced setup: Dedicated mirrorless camera + external XLR microphone + multi-point lighting grid + hardware/software encoder + customized scene overlays.
Choose the Right YouTube Live Streaming Method
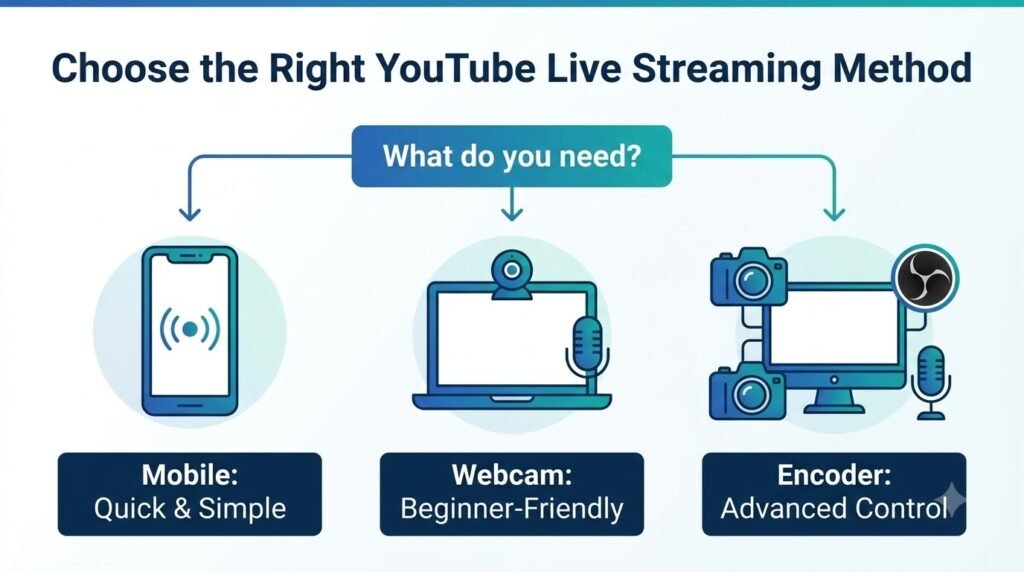
Once your channel is verified and eligible, the next decision is which method to stream from. YouTube supports going live from mobile, webcam, or encoder, and each fits a different kind of content. Here’s how to actually get started with each one.
How to stream on YouTube from mobile
Mobile is the fastest way to go live, and YouTube positions it as the option built for vlogging and quick updates rather than produced content. The general workflow looks like this:
- Open the YouTube app and make sure you’re signed in to the right channel.
- Tap the Create button and start the live-streaming process from there.
- Add your stream details — a title is required, and a description helps viewers know what to look for.
- Choose the suitable visibility and audience settings, such as public, unlisted, or members-only, along with any required “made for kids” selection.
- Configure your camera and orientation, switching between front and back cameras as needed.
- Start the stream once everything looks right in the preview.
Because mobile streaming has no extra hardware to set up, it’s the lowest-friction option for beginners who just want to go live from wherever they are.
How to go live on YouTube with a webcam
Webcam streaming is the straightforward, computer-based option — you just need a computer with a webcam. It sits between the simplicity of mobile and the flexibility of an encoder. Here’s the general process:
- Open YouTube Studio.
- Select Create, then Go Live.
- Choose the webcam option from the available stream types.
- Allow camera and microphone access when prompted.
- Add a title and description for your stream.
- Configure the stream settings, including visibility and any advanced options you want.
- Go live once your preview looks and sounds right.
This method works well for anyone doing a talking-head stream directly from their desktop without needing separate streaming software.
How to live stream on YouTube with an encoder
An encoder is the option built for more advanced production. Creators typically reach for encoder streaming when they need:
- Gameplay capture
- Screen sharing
- Multiple cameras
- External audio hardware
- Overlays
- More advanced production generally
Rather than using YouTube’s built-in tools, an encoder uses third-party software (such as OBS or Streamlabs) to combine them and send them through a stream key to YouTube.
This is slightly more involved than mobile or webcam streaming, but necessary if you want to go beyond a single camera and microphone.
When should a beginner use an encoder?
Matching the method to the content makes the decision simple:
- Talking-head Q&A → webcam
- Casual update or on-the-go content → mobile
- Gaming → encoder
- Tutorial with screen sharing → encoder
- Multi-camera production → encoder
If your stream only needs one camera and a microphone, skip the encoder complexity. Reach for it once your stream involves your screen, more than one video source, or audio gear beyond a basic mic.
How to Set Up Your First YouTube Live Stream Step by Step
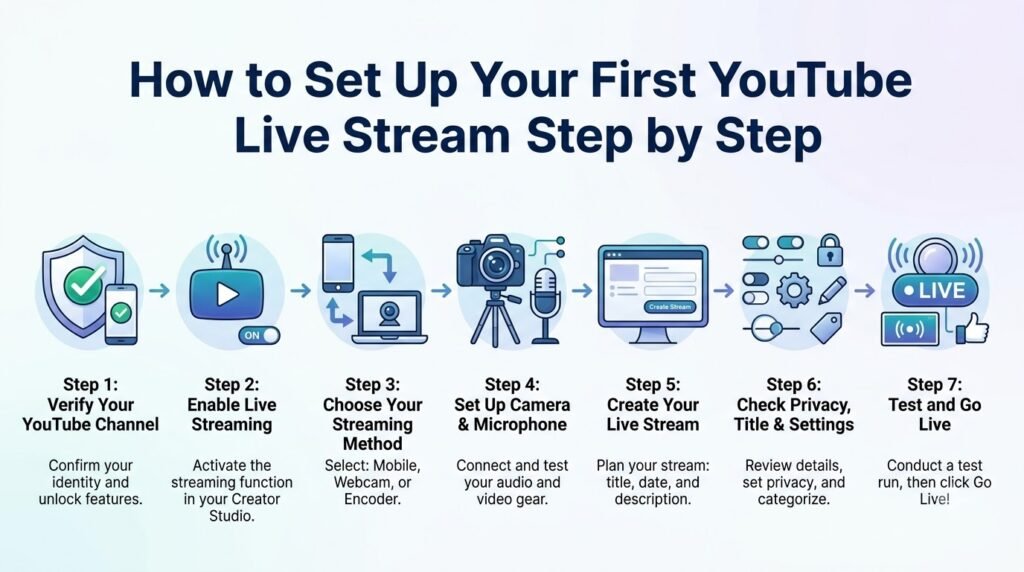
Your first YouTube Live doesn’t need to be complicated. You can start with a phone, webcam, or streaming software and scale up as your needs grow.
Before your first broadcast, make sure your channel is verified, live streaming is enabled, and you don’t have live-streaming restrictions from the previous 90 days. YouTube notes that first-time live streaming activation can take up to 24 hours.
Step 1: Open YouTube Studio and select Go Live
Sign in to YouTube and open YouTube Studio. From the top right corner, choose Create → Go Live. The Live control room will open, where you can create, manage, preview, and go live with your broadcast.
Step 2: Choose your streaming method
YouTube supports three common methods. Webcam is the simplest computer-based option and works well for talking-head videos, Q&As, and tutorials. Streaming software or encoder is best for screen sharing, gameplay, multiple sources, or external audio and video equipment.
Mobile is a good option for vlogs, events, and quick updates from your phone. It has some requirements such as a minimum of 50 subscribers.
Step 3: Create your live stream
Add a clear title that tells viewers exactly what the stream covers. Create a helpful description, set the visibility, and choose an option for children.
Set your stream to be public, private, or unlisted. If you’re not going to broadcast right away, pick a future date and time with Schedule. Upload a thumbnail so that people know what your stream is about before it airs.
Step 4: Configure your YouTube Live settings
In the YouTube Live Control Room, review your stream information and settings before broadcasting. Check your camera and microphone, review chat options, confirm visibility, and verify the scheduled time if you’re using a scheduled stream. For encoder streams, YouTube also provides settings such as stream latency and DVR.
Step 5: Set up your stream key for encoder streaming
A YouTube stream key connects your streaming software or encoder to your YouTube channel. You can find it in the Live Control Room under your stream settings, then copy it into the corresponding Stream Key field in compatible streaming software. You may also need to enter YouTube’s stream URL or server URL.
Treat the stream key like sensitive account information. Don’t publish or share it unnecessarily. If you believe it has been exposed, YouTube provides an option to reset the key and update your encoder.
Step 6: Preview and check your stream
Before going live, check the camera framing, microphone levels, screen capture, lighting, title, and description. Watch the preview in the Live Control Room and make sure your internet connection is stable. YouTube recommends testing your setup beforehand and monitoring stream health during the broadcast.
Step 7: Go live
Once everything looks correct, start your webcam or encoder stream if you’re using one. For encoder streaming, wait for the preview to appear in the Live Control Room, then select Go live. When The Stream Is Up.
When the broadcast starts, greet the viewers, keep chatting with them, and watch the stream health. After you are done, close the stream from your YouTube account or the encoder.
YouTube Live Stream Settings Beginners Should Understand
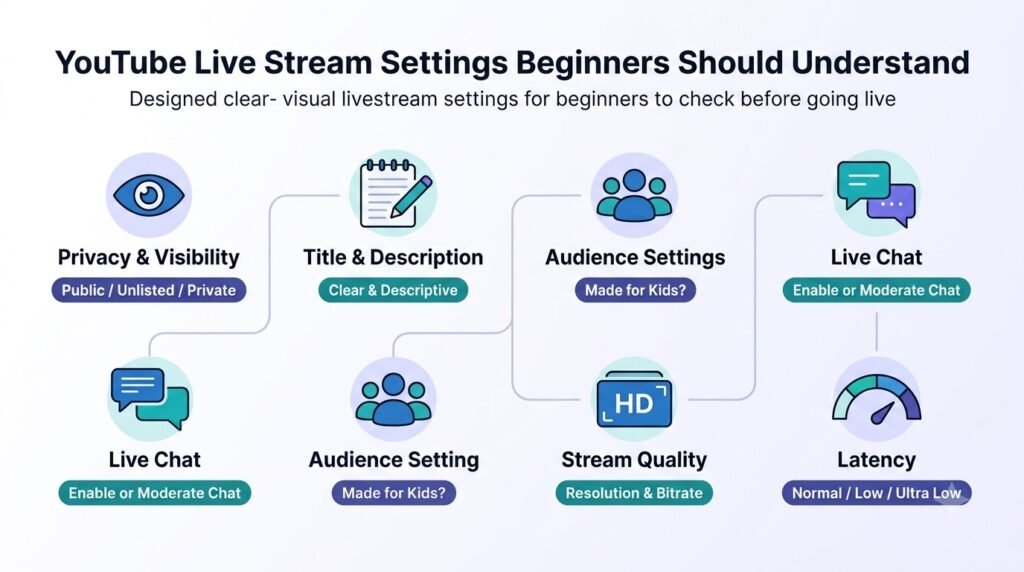
Title and description
Your title and description act as your primary billboard. Instead of putting something generic like “I’m Live,” make sure you’re putting a really specific title that’s indicating to the viewer what they stand to gain by watching your stream, such as “Q&A Session: Growing Your Channel in 2026.”
If you want to master how to live stream on YouTube, optimizing your metadata is step one. A good YouTube live stream title + a description with relevant keywords will help the algorithm to identify your content.
Mention your general YouTube live streaming setup details or agenda so that the would-be viewers get an idea of what the stream is about right away and click the link.
Public, unlisted, and private streams
YouTube provides three core visibility settings for your broadcasts:
- Public: Visible to everyone, searchable, and pushes notifications to your subscribers.
- Unlisted: Only people who know the link can see the video, so it won’t appear on your channel or anyone’s else’s.
- Private: Strictly restricted to you and invited accounts only.
Testing: Running an unlisted test stream beforehand is an essential best practice. You can review the video’s bitrate, audio sync, and transitions with overlay without notifying your entire audience.
Horizontal vs. vertical live streaming
Choosing the right orientation changes how viewers consume your content:
- 16:9 horizontal: The traditional widescreen format ideal for gaming, software tutorials, and multi-cam panel discussions.
- 9:16 vertical: Designed for mobile screens, capturing an immersive full-screen presentation.
YouTube supports vertical live experiences, which can appear directly in the mobile Shorts feed. Furthermore, YouTube Studio also has a documented dual-stream setup (in the Live Control Room’s layout options) that can automatically handle horizontal and vertical simultaneously, allowing to reach viewers on multiple surfaces at once.
Live chat and moderation settings
A healthy community keeps your chat engaging and prevents disruptive behavior:
- Chat interaction: Encourage questions from the audience and enable slow-mode to avoid getting flooded with messages.
- Moderation: Activate spam/link filters and abusive language filters to automatically block irrelevant or harmful content.
- Blocked words: Add a list of forbidden words to the filtered system to maintain a consistent brand image.
- Managing unwanted comments: Hide or mute commenters directly from your dashboards.
- Assigning moderators: Assign the role of a moderator to a member of the audience or another creator to manage and monitor the chat while you are presenting.
Schedule your YouTube Live
Scheduling a broadcast ahead of time generates a dedicated watch page before you go live. This window will let you promote the link on social media, give your audience time to free up their calendars, and make sure your custom thumbnail, tags, and stream description are all set.
Test Your YouTube Live Streaming Setup Before Going Live
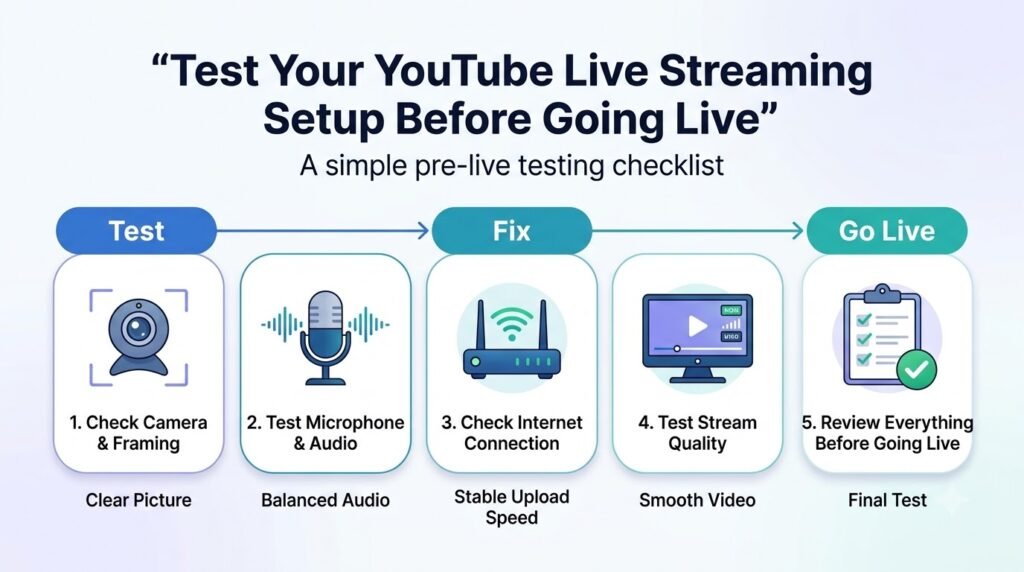
Testing your setup before broadcasting is a good way to avoid simple tech issues from ruining your first YouTube Live. A quick test run allows you to confirm that your camera, audio, internet connection, and stream settings are all working properly before your audience arrives.
When learning how to test a YouTube live stream, focus on each element of your production, instead of just confirming that the video is showing.
Check your camera and framing
Start by checking how you look on camera. Make sure your face or the main object is clearly visible and that the camera is stable. Keep the background clean enough that it doesn’t distract from the stream.
Also check your lighting for consistency. Don’t have a bright window behind you and avoid having your face too dark.
Test your microphone and audio levels
Audio problems can make an otherwise good stream difficult to watch. Speak at your normal volume and check that your microphone picks up your voice clearly without clipping or distortion. Listen for background noises, fans, and echoes
Confirm that YouTube or your streaming software has selected the correct microphone.If you can, use headphones to hear any problems that may not be obvious on your own speakers.
Test your internet connection
Live streaming depends heavily on a stable upload connection because your device continuously sends video and audio to YouTube. A download speed is one thing. But you should also consider the stability of the connection during an upload.
Using an Ethernet cable is a good idea when you’re doing something like this. For important events, consider having a backup internet option such as a mobile hotspot.
Run a private or unlisted test
A private or unlisted test stream gives you a safe way to check the complete YouTube live streaming setup before inviting viewers. Review the test recording or have someone watch it from another device. Look for missing audio, the wrong camera, incorrect screen capture, poor framing, software problems, or incorrect stream settings.
Use a pre-live checklist
Before selecting Go Live, run through this quick checklist:
Before going live:
- Camera checked
- Microphone checked
- Internet checked
- Title checked
- Description checked
- Thumbnail checked
- Audience setting checked
- Chat settings checked
- Stream method checked
Once everything passes the test, you’re ready to start your broadcast with fewer surprises.
How to Prepare Content for Your First YouTube Live
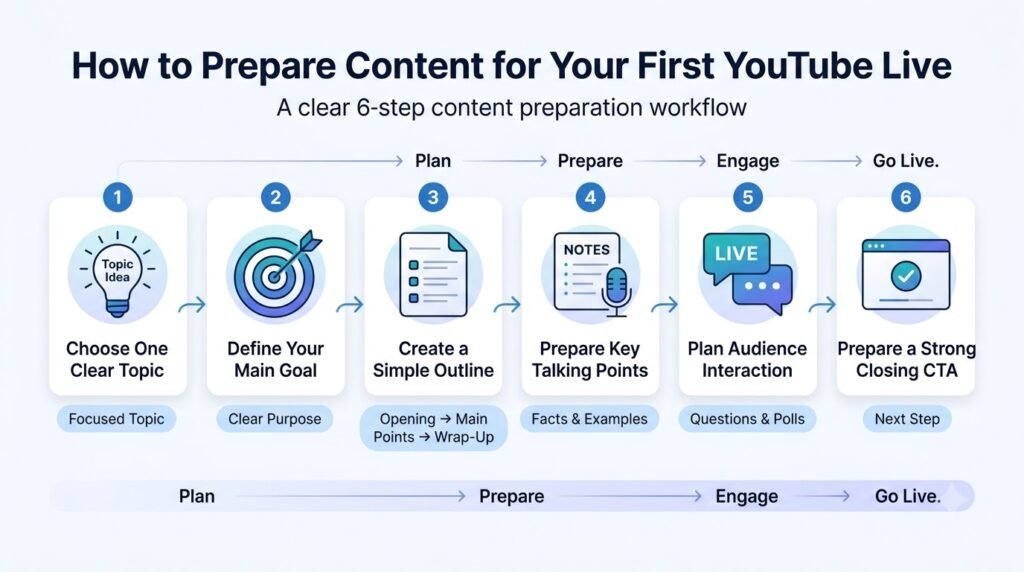
The technical setup only gets you as far as pressing “Go Live.” What happens in front of the camera is what keeps viewers watching, and that part deserves just as much preparation.
Choose a simple format for your first live stream
Pick a format you can sustain for the full length of the stream without running out of things to say. Good beginner-friendly options include:
- Q&A
- Tutorial
- Product demonstration
- Gaming session
- Behind-the-scenes session
- Community discussion
- Live commentary
- Educational session
A focused format gives you a reason for the stream to exist, which makes it easier to promote beforehand and easier to talk through once you’re live.
Create a simple live-stream outline
You don’t need a script, but you do need a loose shape to follow: Opening → Main topic → Audience interaction → Q&A → Closing CTA.
An outline like this matters more for live content than recorded video, because there’s no edit to smooth over dead air. Beginners who go in with zero structure tend to freeze up once the initial excitement wears off, or they wrap up in five minutes with nothing left to say.
A simple sequence provides natural cues for moving through your content: introduce a topic, present your information, invite discussion, answer questions, and prompt a specific action.
And yet, it allows you enough flexibility in the moment to keep the conversation flowing or respond to comments and questions as they come in, so that you aren’t just reading from a teleprompter.
Prepare your title, description, and thumbnail
These assets are worth finishing before you ever open the Live Control Room, not while you’re already live and trying to hold a conversation.
A catchy title tells viewers what’s in store for them, the description provides more details and links, and a custom thumbnail makes your stream pop out in a viewer’s feed and search results. All that prior to going live means your only job when you hit “go live” is starting the stream itself.
Use ytZolo to prepare supporting YouTube content
Before going live, creators still need a strong title, description, thumbnail concept, and content structure — the same groundwork that goes into any YouTube video.
ytZolo can prepare these assets for you in a single workflow, making live-streaming feel like a natural extension of your existing content planning process.
The platform includes AI tools for YouTube titles, descriptions, thumbnails, scripts, tags, and audio production, which means the same tool you’d use to plan an upload can also help you walk into your first live stream prepared.
How to Promote a YouTube Live Stream Before It Starts
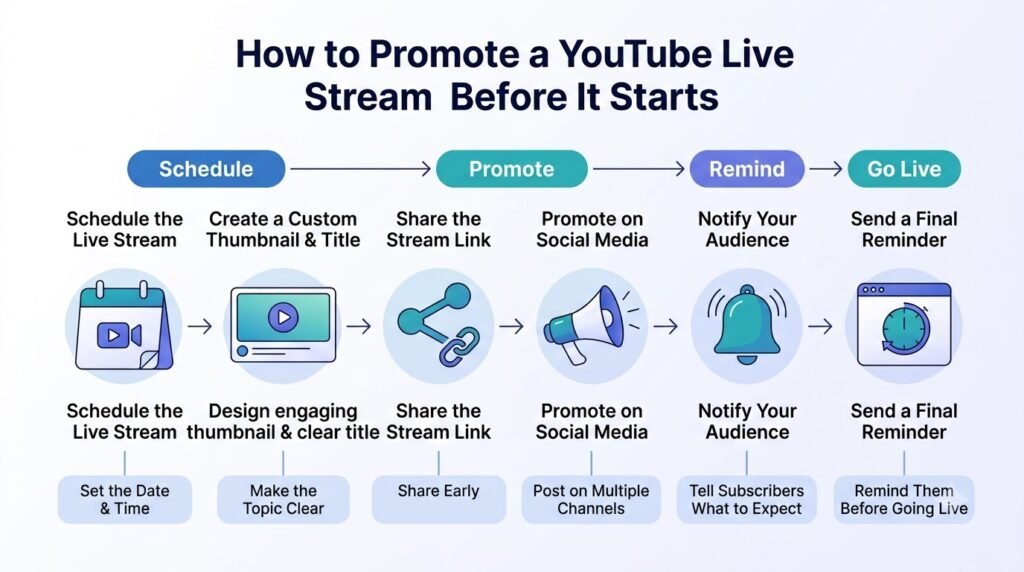
Schedule your live stream in advance
Scheduling your broadcast ahead of time creates an official landing page and watch link days before you actually hit record.
This provides your audience with a concrete date to look forward to, gives your subscribers the option to set reminders, and gives you enough time to double-check your tech, preview your custom thumbnail, and perfect your talking points.
Create a clear announcement
Furthermore, when inviting people, you can save them from guesswork by providing the critical information right away. Every promotional graphic or post should clearly state:
- Topic: The core theme or specific question you are tackling.
- Date and Time: Explicitly stated with your time zone included.
- What viewers will learn/get: The specific value or takeaway they can expect.
- Where to watch: A direct, clickable link to your scheduled YouTube watch page.
Promote the stream across your existing channels
Do not rely solely on your main subscriber feed to drive initial traffic. Cross-promote your upcoming event across every corner of your digital ecosystem:
- YouTube Community tab: Post polls, teasers, or countdown graphics directly where your subscribers already hang out.
- Social platforms: Post short entertaining videos, graphics or stories on Instagram, X, LinkedIn or Facebook.
- Email list: Send a dedicated broadcast to your newsletter subscribers with a direct call-to-action button.
- Website: Embed the scheduled watch page or an announcement banner on your personal site or blog.
- Existing videos: Add a brief verbal call-to-action or an info card pointing to the upcoming live stream on your recent uploads.
Remind viewers shortly before going live
Timing is everything when it comes to capturing attention.
Announcing the stream weeks ahead makes people forget, but posting a reminder just two minutes before it goes live takes people by surprise.
Strike the right balance by posting a quick reminder 1 to 2 hours before you go live, followed by a final alert the exact moment your broadcast starts so your most active fans can jump right in.
Common YouTube Live Streaming Setup Mistakes Beginners Make
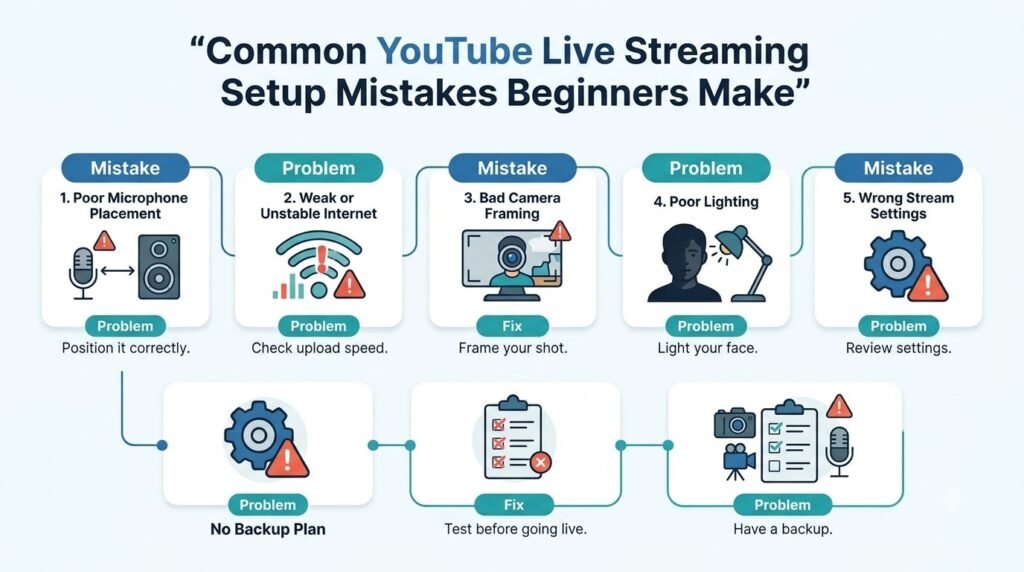
Beginners may get so caught up in the gear and programs that they forget what makes a live stream enjoyable for both participants. A simple setup that has proven itself to be reliable is far more valuable than a complex one that can cause all manner of glitches.
Buying too much equipment too early
You don’t need an expensive camera, multiple lights, a capture card, or a complex audio setup to start streaming. First, validate your content format and learn what your audience responds to. You can upgrade equipment after you know which improvements will actually make a difference.
Ignoring audio quality
Poor audio can make viewers leave even when the video looks good. Common issues such as echo, low volume, background noise, and selecting the wrong microphone input are examples of things that can be resolved by the pre-check list.
Before going live, listen to a short recording or test stream and make sure your voice is clear and consistent.
Going live without testing
Technical issues are easier to fix before the stream starts. By using pre-show checklist to access the camera, microphone, internet connection, lighting, stream settings and screen sources you can keep extra broadcast interruptions away.
Making the stream too complicated
Adding many scenes, cameras, overlays, sources, and effects can make your setup harder to manage. Start with only the elements you actually need. Once you are comfortable switching scenes and monitoring the stream, you can step by step add more production features.
Going live without a content plan
Even casual or conversational streams benefit from a basic outline.Write down your opening, points, questions you want to raise, and a couple of backup topics. You don’t have to write a word-for-word script, but it will help you keep the conversation flowing.
Forgetting to interact with the audience
Live streaming allows viewers to participate while the content is happening. Acknowledge comments, answer relevant questions, ask viewers for their opinions, and refer to people by name when appropriate.
This makes the difference between a live stream and a video that was recorded beforehand, it gives people a reason to be there.
YouTube Live Streaming Tips for Beginners
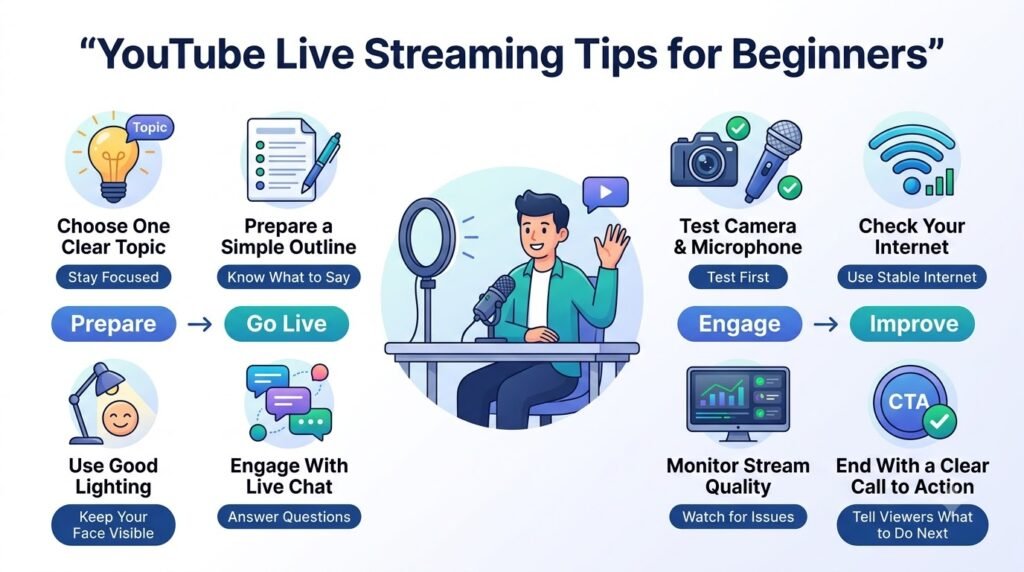
Start with the simplest setup that works
You don’t need a professional studio to go live. A decent phone or webcam, decent/internet connection plus free software such as OBS Studio or YouTube’s native software for video streaming, is enough to start a live stream.
Even the most successful streamers started their journey with cheap/webcam and invested into better equipment once they understood what their audience wanted to see. Don’t let the need for the best gear stop you from doing what you want.
Prioritize audio, lighting, and stability
Viewers forgive average video quality far more easily than poor audio. Invest in a good microphone. Then make sure you look nice (natural lighting next to a window is ideal, or an inexpensive ring light).
Finally, test your internet connection; nothing ruins a stream more than laggy upload speeds that cause skips and glitches in the video.
Keep your first stream manageable
Choose a topic that you’re already knowledgeable about, not something grandiose. A simple Q&A, a tutorial, or a casual conversation about something you’re familiar with would allow you to focus more on the mechanics of streaming, such as camera, chat, and mic.
Talk to your viewers throughout the stream
Live streaming’s biggest advantage over uploaded video is real-time interaction. Read chat messages aloud, ask questions, and conduct polls and respond directly to comments.
The result is prolonged user engagement and the impression of a community that will keep the viewer returning.
Review your stream after it ends
Once you’re done, analyze the data:
- What were the viewer behaviors? Did many people join or leave?
- How engaged were they? Likes, comments, polls
- Any technical difficulties? Glitches, drop in quality, audio issues
- Retention rates and other stream stats that are available
By doing this, you can adjust your settings, pace, and content for future streams.
FAQs: YouTube Live Streaming Setup Guide for Beginners
How do I live stream on YouTube for the first time?
First, verify your YouTube channel and make sure live streaming is enabled. You can then choose a streaming method: mobile, webcam, encoder, or supported console. In YouTube Studio, click on Create → Go live.
Enter your title, description, visibility, and other settings, and make sure your camera and microphone are working properly before you start. If you’re using an encoder, connect it to YouTube with the stream key and server URL.
What are the YouTube live streaming requirements?
YouTube requires channels to be verified and free from live-streaming restrictions during the previous 90 days. The minimum age to live stream is 16. In addition to these requirements, additional requirements are imposed that depend on the chosen method.
For example, streaming via mobile devices currently requires at least 50 subscribers, channel verification, the ability to broadcast live video, and a supported device. Your first mobile stream may also take up to 24 hours to become available.
Can I live stream on YouTube without an expensive camera?
Yes. In addition, beginners can use a smartphone or computer webcam instead of a standard camera.
YouTube supports mobile and webcam streaming, so you can start with equipment you already have. Good lights and good audio can do wonders for your cam setup.
What equipment do I need to live stream on YouTube?
A basic setup usually includes a camera, microphone, lighting, and stable internet connection. A smartphone can combine several of these into one device.
An encoder or streaming program is optional, and will come in handy if you want to do screen sharing, multiple cameras, overlays, gameplay, or other production friendly stuff.
Do I need OBS to live stream on YouTube?
No. The methods of streaming on YouTube include mobile, webcam, encoder, and console options. You may need an OBS or another encoder to have more control over scenes, sources, cameras, overlays, and other production elements during the broadcast. (Google Help)
How do I get my YouTube stream key?
Open YouTube Studio → Create → Go live, then select the Stream tab in Live Control Room. Your stream key is available in the stream settings. If you’re using an encoder, enter the YouTube stream key and server URL into the encoder. Keep the key private because anyone with access to it may be able to send a stream to your channel.
Should I use vertical or horizontal YouTube Live?
The choice depends on the content and where you expect viewers to watch. Horizontal 16:9 is good for classical YouTube watching, presentations, games or computer- or TV-friendly contents.
Vertical 9:16 is designed for mobile viewing and can appear in YouTube’s vertical live feed alongside Shorts. In some cases of workflow, YouTube also provides live horizontal and vertical videos simultaneously.
Can I test a YouTube live stream before making it public?
Yes. Set the stream to Private or Unlisted whilst testing, this allows you to test your hardware, lighting, scenes, streams, mic level, ISP connections, etc. without making it public.
YouTube specifically recommends using an unlisted stream to test audio, video, and equipment before a public live stream.
Final YouTube Live Streaming Setup Checklist
Before you go live, make sure to do this checklist so you can avoid these little things that many new streamers do.
Channel
- Verified
- Eligible for live streaming
- No relevant restrictions
Equipment
- Camera ready
- Microphone tested
- Lighting checked
- Internet stable
Stream
- Title written
- Description written
- Thumbnail prepared
- Audience setting selected
- Visibility selected
- Chat settings checked
Content
- Topic defined
- Outline prepared
- Opening prepared
- Audience questions prepared
- Closing CTA prepared
Before Go Live
- Test camera
- Test microphone
- Test screen capture
- Confirm stream method
- Confirm stream settings
Go through each section a few minutes before your scheduled start time — not the moment you plan to go live — so you have room to fix anything that isn’t working.
Remember: your goal for a first stream is a reliable broadcast, not a perfect studio. Do all of these things on this list, and the things not on this list will improve after a while.
Author Bio
Anshika Verma is a content researcher and writer at ytZolo, creating practical, research-backed content on YouTube growth, creator tools, and content strategy.

