
📋 Quick Summary: Adding an AI voiceover to a YouTube video takes five steps — write or paste your script, generate the voice, adjust tone and pacing, export the audio, then sync it to your footage. This tutorial walks through the exact workflow using ytZolo‘s Audio Studio, plus the mistakes that make AI narration sound off.
You’ve got footage. You’ve got a script, or at least an idea for one. What you don’t have is a voice actor, a mic setup, or three hours to record twelve takes of the same intro line.
That’s exactly the gap an AI voiceover closes. This tutorial covers how to add AI voiceover to YouTube video content from scratch — script to final export — using a real, repeatable workflow instead of vague tips.
By the end, you’ll have a narrated video ready to upload, and you’ll know how to fix the two or three things that make AI narration sound obviously synthetic.
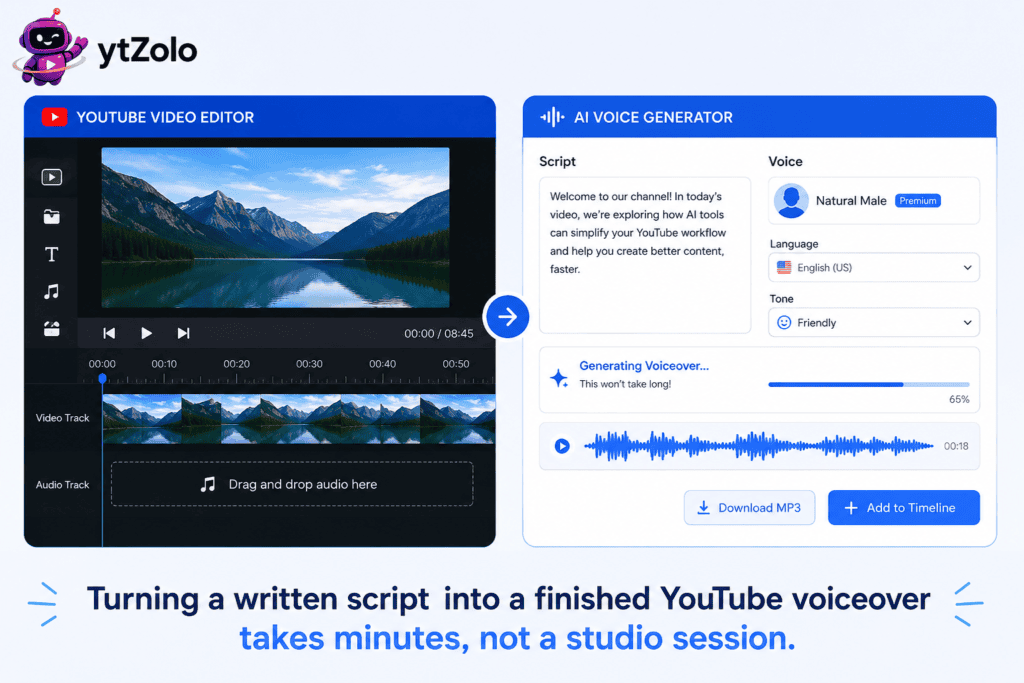
Table of Contents
How to Add AI Voiceover to YouTube Video: Quick Overview
If you just need the short version before diving into details, here’s how to add AI voiceover to YouTube video content in five steps:
- Write or tighten your script — the AI can only read as clearly as the text you give it.
- Choose a voice that matches your channel’s tone, previewed on your own script line.
- Generate the voiceover and listen back to the full draft before moving on.
- Adjust tone and pacing section by section instead of accepting one flat read.
- Export and sync the audio to your footage on its own track.
Each step is broken down in detail below, along with the mistakes that most often make AI narration sound synthetic.
Why Creators Are Switching to AI Voiceovers
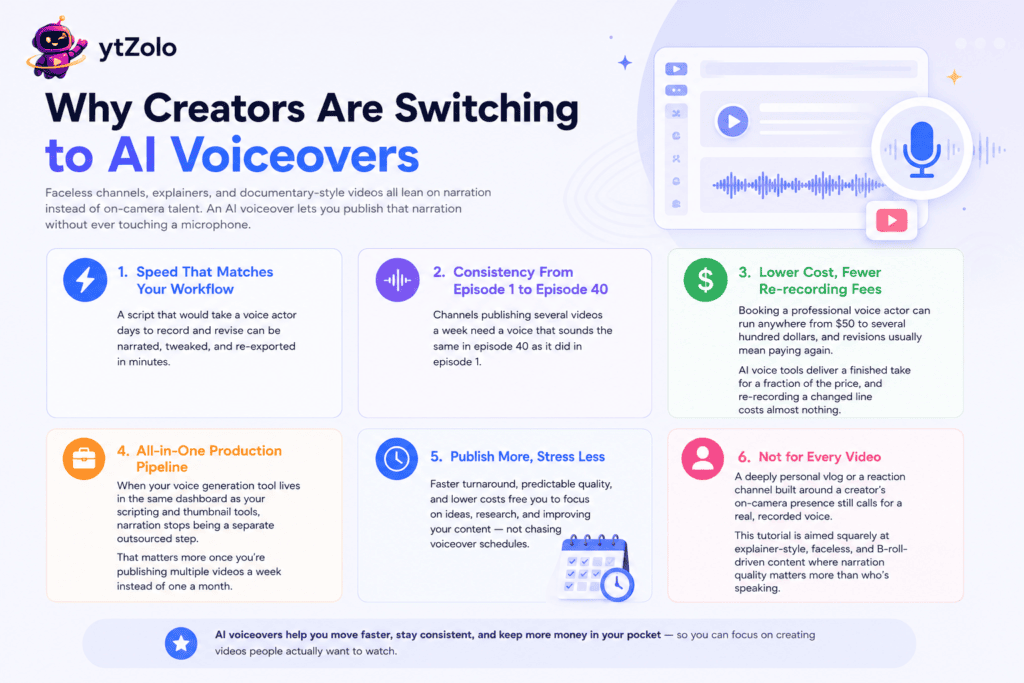
Faceless channels, explainers, and documentary-style videos all lean on narration instead of on-camera talent. An AI voiceover lets you publish that narration without ever touching a microphone.
The bigger draw is speed. A script that would take a voice actor days to record and revise can be narrated, tweaked, and re-exported in minutes.
Consistency matters too. Channels publishing several videos a week need a voice that sounds the same in episode 40 as it did in episode 1 — something even skilled voice actors can struggle with across sessions.
Cost is the other piece of the equation. Booking a professional voice actor for a single video can run anywhere from fifty dollars to several hundred, and revisions usually mean paying again. A synthetic voice tool produces a finished take for a fraction of that price, and re-recording a changed line costs almost nothing.
There’s also a production-pipeline argument that doesn’t get mentioned enough: when your voice generation tool lives in the same dashboard as your scripting and thumbnail tools, narration stops being a separate outsourced step. That matters more once you’re publishing multiple videos a week instead of one a month.
None of this means AI narration is the right call for every video. A deeply personal vlog or a reaction channel built around a creator’s on-camera presence still calls for a real, recorded voice — this tutorial is aimed squarely at explainer-style, faceless, and B-roll-driven content where narration quality matters more than who’s speaking.
What You Need Before You Start
You don’t need much to get started. Here’s the short list.
- A finished or near-finished script
- An AI voice generator with a natural-sounding voice library
- Your video footage, ready for editing
- A video editor that supports separate audio tracks
If your script isn’t written yet, start with a script before opening the voice tool — a tightened script produces a tighter voiceover, since the AI is only ever as clear as the text it’s reading.
Step 1: Write or Prepare Your Script
Every AI voiceover starts as text, so this step decides more of the final quality than people expect. A rambling script produces a rambling voiceover, no matter how good the voice sounds.
Keep sentences short and read them aloud once before generating audio. If a line trips your own tongue, it will likely trip the AI’s pacing too.
Break the script into logical sections — hook, body, CTA — so you can regenerate one section later without redoing the whole file. This also makes it easier to match narration to specific scenes during editing.
If you’re narrating a skit or multi-character video rather than a single-voice explainer, a plain script isn’t the right format — a dedicated dialogue workflow handles speaker turns and back-and-forth pacing more cleanly than a single narration track.
Mark up your script lightly before generating anything. A comma where you want a short pause, an ellipsis for a longer beat, and a period at the true end of a thought all give the voice engine more to work with than a wall of unpunctuated text. This one habit fixes more pacing problems than any setting inside the voice tool itself.
It also helps to read the script out loud once at the pace you’d actually want the video to move. If a sentence runs out of breath in your own read-through, it’s too long for a single line of AI narration too — split it in two.
Step 2: Choose the Right AI Voice
Voice choice shapes how your channel feels before a single word is understood. A mismatched voice — too formal for a casual vlog, too casual for a finance explainer — undercuts even a well-written script.
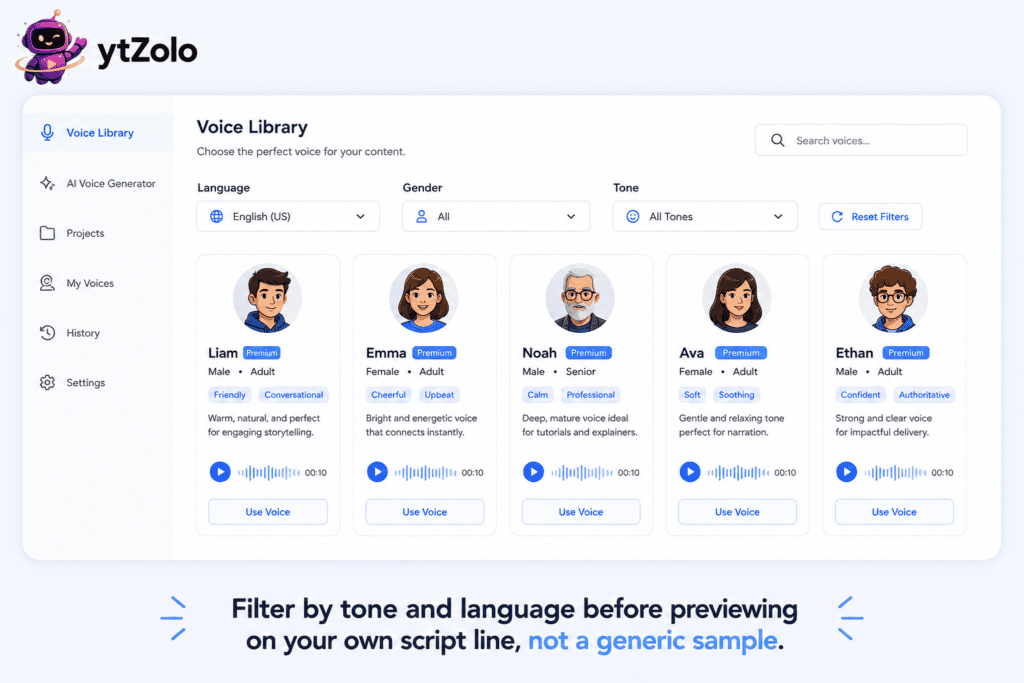
Filter by language and accent first, then narrow by tone: calm and authoritative for explainers, upbeat and energetic for entertainment, warm and conversational for storytelling.
Preview the voice on a real line from your script, not a generic demo sentence. Demo lines are written to sound good in isolation; your actual script has different rhythm and vocabulary.
If you’re comparing voice libraries across platforms before committing, ytZolo’s best AI voice generator roundup tests realism and pricing across nine tools side by side.
It’s worth testing two or three voices against the same script line rather than settling on the first one that sounds decent. Voices that sound great reading a calm intro can sound flat reading an energetic call-to-action, and you won’t catch that mismatch until you actually compare them back to back.
Also check whether the voice you like is available on your current plan. Free tiers commonly restrict access to premium voices, so it’s worth confirming before you build an entire video around one specific voice profile.
Step 3: Generate the Voiceover
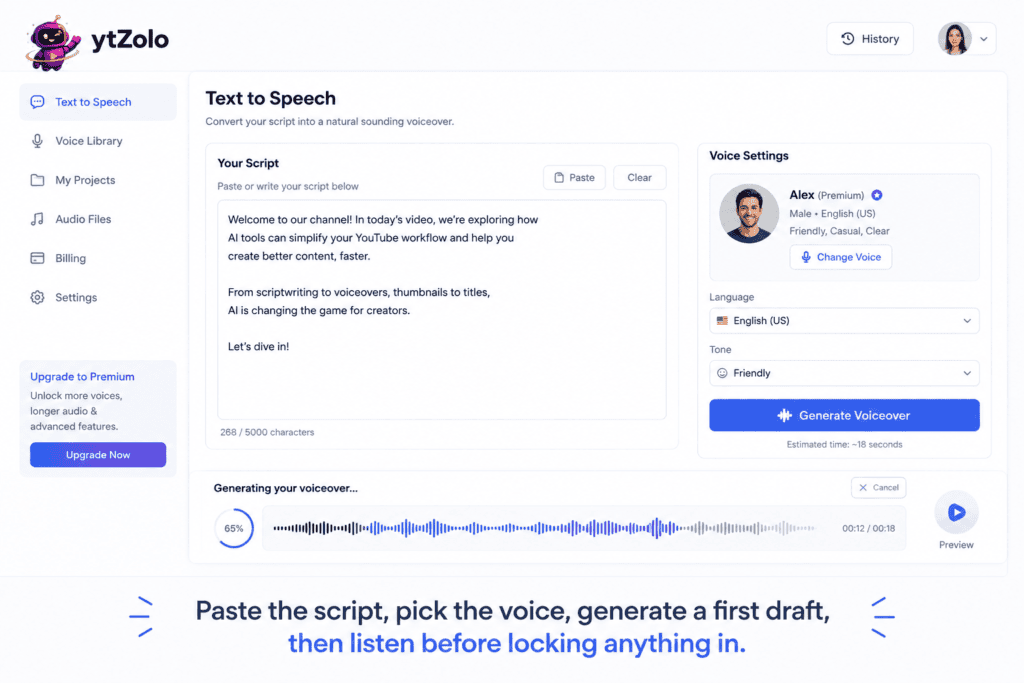
This is where the script becomes audio. Inside ytZolo’s Audio Studio, the process follows a simple loop: paste text, pick a voice, generate, listen back.
Open the Audio Studio from your ytZolo dashboard and paste your finished script into the text box. Longer scripts can usually be dropped in as a full document rather than pasted line by line.
Select the voice you previewed in Step 2, then generate a first pass of the full script. Treat this first version as a draft — it rarely needs zero edits.
For the complete breakdown of every setting inside the generator, from voice cloning to SSML pacing controls, see the full voice generation workflow on ytZolo’s voice generator guide.
Listen back to the full draft before moving on. It’s far easier to catch a mispronounced brand name or a rushed sentence now than after you’ve already synced it to footage.
Step 4: Adjust Tone, Pacing, and Emphasis
A first-pass voiceover is rarely camera-ready. This step is where a flat AI reading turns into narration that actually holds attention.
Slow down technical explanations and speed up fast-paced intros — a single flat pace across an entire video is one of the fastest ways to lose watch time.
Adjust emotional tone where the script calls for it: calmer for a serious point, more energetic for a call to action. Most modern voice tools let you direct delivery rather than accept one flat read.
If a specific line needs a different vibe entirely — playful instead of neutral, or dramatic instead of conversational — that’s a tone shift, not just a pacing fix, and it’s worth testing a couple of voice presets before settling.
Watch for mispronounced names, brand terms, or acronyms. Adjusting spelling slightly or using pronunciation controls, where the platform supports them, usually fixes this without regenerating the whole file.
Regenerate in small chunks rather than the entire script every time you make a change. Most voice tools let you re-render a single sentence or paragraph, which saves time and keeps the parts you already liked untouched.
If you’re narrating something technical — a tutorial, a review, a breakdown of numbers — resist the urge to speed everything up for the sake of pacing. Viewers following a technical explanation need slightly more room to process each point than they do during a fast-cut entertainment intro.
Step 5: Export and Sync With Your Video
Once the voiceover sounds right on its own, the final step is getting it into your actual video project.
Export the finished audio as MP3 or WAV — WAV if you plan to do heavier post-processing, MP3 if you’re dropping it straight into a rough cut.
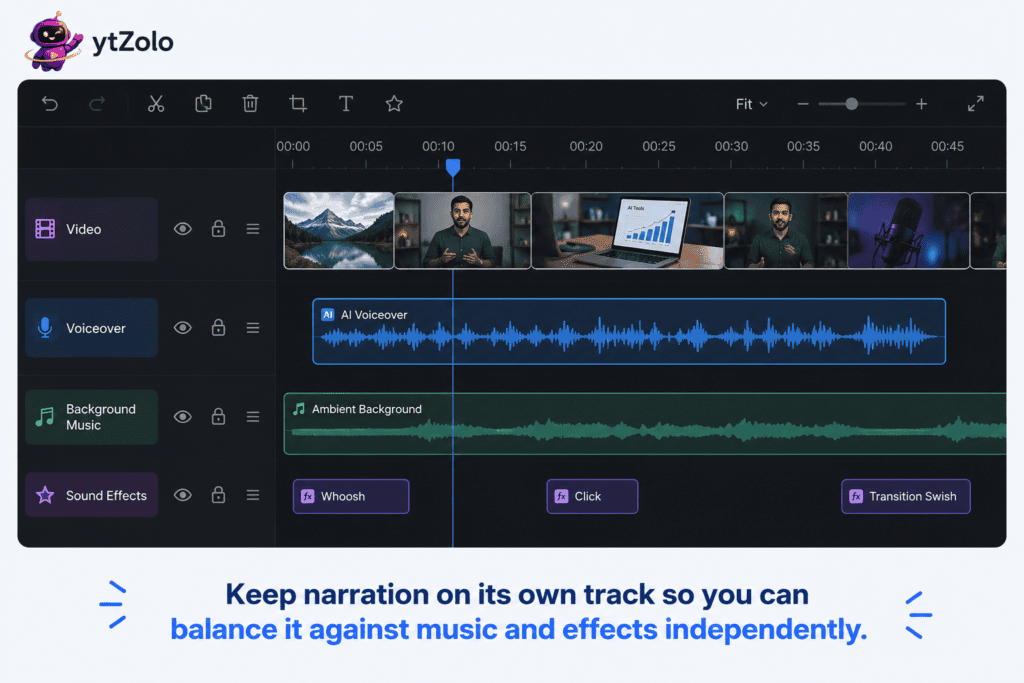
Import it into your video editor on its own audio track, separate from any background music or sound effects, so you can adjust levels independently later.
Line up the narration against your footage scene by scene. If a line runs long or short for its matching clip, trim the silence at the start or end of that audio segment rather than speeding up the whole track, which can distort the voice.
Once your voiceover is locked, pair it with a thumbnail that matches the tone you just built — a mismatched thumbnail and voice style can undercut click-through even on a well-narrated video.
Common Mistakes That Make AI Voiceovers Sound Fake
Most AI voiceover problems trace back to a handful of repeatable issues, not the technology itself.
Skipping the script edit. Reading a rough draft aloud through AI just makes rough writing audible. Tighten the text first.
Using one flat tone for the whole video. A ten-minute video narrated in a single emotional register gets monotonous fast, even with a great-sounding voice.
Ignoring pacing around punctuation. Long sentences with no natural pause points force the AI to rush through, which reads as robotic even on premium voices.
Skipping the listen-back pass. Publishing the first generated draft without a review is how mispronunciations and awkward pauses make it to the final video.
If your voiceovers keep sounding synthetic even after these fixes, ytZolo’s breakdown of why AI voices sound robotic covers nine deeper causes, from source audio quality to over-processed settings.
AI Voiceover vs. Recording Your Own Voice
Neither option wins every time — the right call depends on the video.
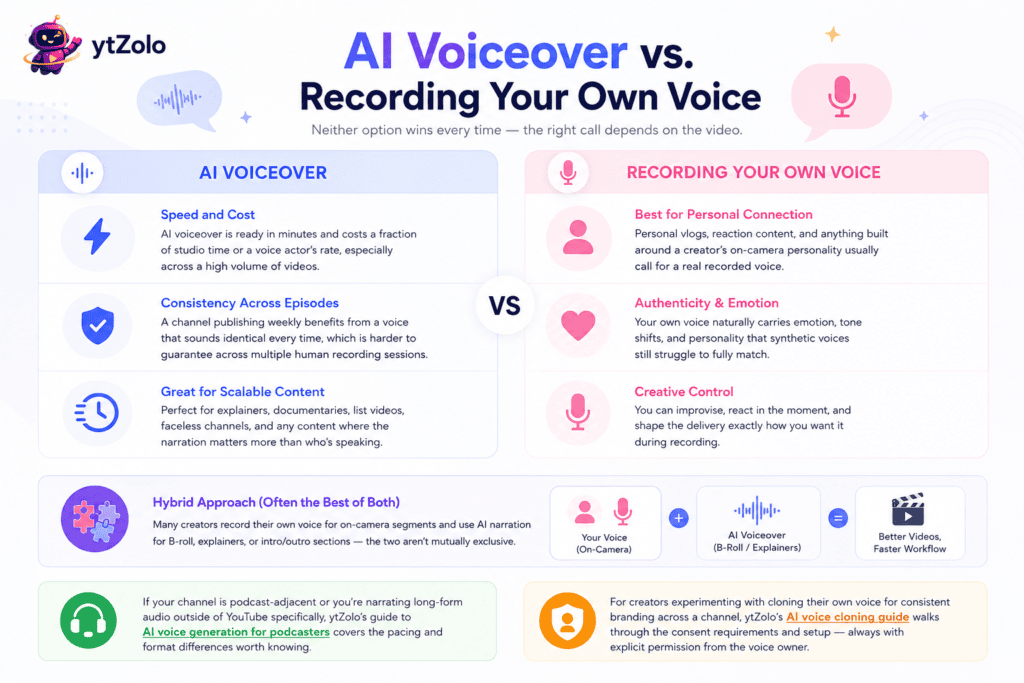
Speed and cost. An AI voiceover is ready in minutes and costs a fraction of studio time or a voice actor’s rate, especially across a high volume of videos.
Consistency across episodes. A channel publishing weekly benefits from a voice that sounds identical every time, which is harder to guarantee across multiple human recording sessions.
When your own voice still wins. Personal vlogs, reaction content, and anything built around a creator’s on-camera personality usually call for a real recorded voice, not synthetic narration.
Hybrid approach. Many creators record their own voice for on-camera segments and use AI narration for B-roll, explainers, or intro/outro sections — the two aren’t mutually exclusive.
If your channel is podcast-adjacent or you’re narrating long-form audio outside of YouTube specifically, ytZolo’s guide to AI voice generation for podcasters covers the pacing and format differences worth knowing.
For creators experimenting with cloning their own voice for consistent branding across a channel, ytZolo’s AI voice cloning guide walks through the consent requirements and setup — always with explicit permission from the voice owner.
Final Verdict
An AI voiceover is the right call for the majority of YouTube content that leans on narration rather than an on-camera personality — explainers, faceless channels, tutorials, and documentary-style videos all benefit from the speed, cost, and consistency it offers over booking studio time.
The quality gap that used to make AI narration obvious has mostly closed on modern platforms, but the workflow still matters more than the tool. A tight script, a well-matched voice, and one honest listen-back pass before export will do more for the final result than any single setting inside the generator.
Save a live, recorded voice for the videos where your personality is the point — vlogs, reactions, and anything built around being on camera. For everything else, the five-step workflow above gets you from script to a published, narrated video without ever opening a mic.
FAQ
Is it OK to use AI voiceovers on YouTube? Yes. YouTube doesn’t penalize AI narration on its own, though certain types of realistic, AI-altered content require disclosure under YouTube’s content policies.
Do I need to disclose an AI voiceover to viewers? Not always. Per YouTube’s official help center guidance on disclosing altered or synthetic content, disclosure is required mainly for realistic AI-generated or altered media that a viewer could mistake for real footage — plain narration read over your own video generally isn’t the kind of use this rule targets, though cloning a real, identifiable person’s voice would be.
Can I use AI voiceovers on monetized videos? Yes, as long as your voice tool’s plan includes commercial licensing. Check the terms on your specific tier before publishing to a monetized channel.
How long does it take to generate a voiceover for a 10-minute video? Generation itself typically takes seconds to a couple of minutes. The listen-back and adjustment pass usually takes longer than the generation step itself.
Can I match the AI voice’s emotion to different parts of my script? Yes, on most modern platforms. You can direct tone section by section — calmer for serious points, more energetic for a call to action — rather than accepting one flat reading across the whole script.
What file format should I export for editing? WAV if you plan further audio processing, MP3 if you’re dropping the file straight into a rough cut. Both work fine for most YouTube editing workflows.
About the Author
Anshika Verma Email: anshika@ytzolo.com
Anshika Verma researches AI creator tools, voice synthesis, and YouTube production workflows. Her work focuses on testing AI voice and audio platforms against real production use cases, translating that testing into practical, step-by-step guidance for creators, agencies, and marketing teams.

